Hair style for man – Tiktok Edition

Hi guys, finally I have a new hair tutorial for you. Stay tuned and learn how to style your hair perfectly for any occasion as a man. Currently I have a few highlights on the top and my hair is a little longer. So this tutorial is perfect for those who want to tame their wild mane. Learn now how to make the TikTok hairstyle work for you.

Step 1

If you start with freshly washed hair, the first thing you need to do is dry your hair. The top of the hair can still be a little damp, but the sides and back should be completely dry. When washing, you should use high quality products that nourish your hair. I use conditioner every day, shampoo every other day and once a week I apply a hair mask. In addition, I also use some hair oil from time to time. Currently I use the products of Fable & Mane /ad non-paid.

Step 2

In the next step, I apply some volume foam. Therefore I use a product from Syoss / ad non-paid. For this I use about a handful of foam, distribute it in my hands and then apply the foam in my hair where I want to have volume. Since I like to have volume in the front, I apply the foam predominantly on the front. I also add a little to the sides and back. To make sure it has the desired effect, I rub the foam and make sure it reaches the roots, because it is from them that the volume is generated. Currently it looks like the typical surfer style hairstyle. That’s why I’m already moving on to the next step.

Step 3

To avoid a wet look, I blow dry my hair using a brush. It is important to use the hottest temperature level, but not the strongest level. I roll my hair up with the brush and dry it from down and the top. In this step, do not hold the hair dryer in one place for too long, otherwise the hair will dry out. Now repeat the same with the side. After I’m done with the top hair I repeat this step with my right and left hair parts as well. In the end the rest of the back of the head must be blow-dried. Here I use no brush, but simply my hands to speed up the process.

Step 4

Now a little bit of a matte paste can be applied. I don’t use hairspray or hair gel, for example, because I don’t want my hair fixed, but rather a natural look. Here I use the “Strand Matte” matte paste from got2b /ad non-paid and the molding paste from Forte /ad non-paid. In this step the hair can be simply messed up and moved backwards and forwards. Then I tiny it up at the sides and roll it up in the front.

And now my TikTok hairstyle is ready. I hope you like the result. Tell me about your thoughts and your suggestions for improvement in the comments.

Hairstyle Tutorial – short Hair

Hey guys and welcome back to another hair tutorial! This time with my short hair.

I went to the hairdresser, because I didn’t like my long hair anymore. I haven’t done a hairstyle tutorial with this haircut yet, so let’s go! It’s like 5 mm on the side and a normal boy’s length on top.

Step 1: Wet the hair

Wet your hair and start raising it up a little bit, because we are going to use volume foam later on.

Step 2: Volume foam

It doesn’t really matter which product you use. Take a hand full – that’s enough. After that you use the hair dryer and hair brush to style it. Take the brush and roll it into your hair, creating a toll in the process. Then you dry it with the hairdryer. But watch out: don’t get too close, because if you do, your hair dries out and tends to break easily. Analyze the direction or the swirl of your hair. It doesn’t make any sense to force it against ist natural direction.

Step 3: Dry it

When you are finished with your brush, your hand takes over. Dry your hair with the hairdryer.

Step 4:

When your hair is nice and dry, the matt paste comes into play. It doesn’t really matter what paste you use. Take some in both of your hands and really mess up your hair. First mess it up and then tidy it up.

Et voila, you are done!

If you have any suggestions or ideas for new videos, just let me know in the comments. Until then, have a great time and see you soon!

Hair Care Routine | How to care mens hair?

Hey guys, welcome back! Today I want to show you my daily hair routine, let’s go! 

Many people ask me these three questions:
– Which product do I use?
– How often per week do a shower?
– What are the steps of my daily hair routine?

Which Products do I use?

Right now I’m using the products of Fable and Mane. I use the shampoo, conditioner, the mask and the hair oil. They keep my hair strong and hydrated. The link to the products are of course in the description of my YouTube video. 

How often per week do I shower?

I shower almost everyday. I’m going to the gym and sweating, so it is really necessary. I wash my hair everyday, but I don’t use shampoo everyday. That way my hair doesn’t dry out. When I don’t use shampoo I only use water and conditioner.

My hair routine

Before the shower 

Once a week I use hair oil by Fable and Mane. This product strengthens the roots.
Fort hat you need partly wet hair. You can either do it right before showering, because you have to rinse it out later, or you can do it right before going to bed, if you shower in the morning.
With the oil comes a pipette. You drop a few drops of oil onto your roots and then gently massage them in with a comb. Then you let the oil soak in for at least 5 minutes, I do it overnight. Then you wash it out with shampoo. 

Shower 

As I said before I use shampoo every second day. Besides other ingredients there is coconut herb in the shampoo of Fable and Mane. It is important that your shampoo doesn’t dry out your hair too much. That’s why you shouldn’t use too much of it as well. Massage it in from front to back and let it soak for not more than 60 seconds. After that, wash it out.

Then I use the conditioner. It softens the hair and strengthens the ends. Again: don’t use too much. Rub it in your hair, not in your skin. It’s a product for the hair, not the skin. Wait for at least 1 minute and then wash it out. It’s important to wash everything out, because if you want to style your hair later and there is still some conditioner in it, it might feel heavy and it’s harder to style that way.

Once a week I also use the hair mask. It helps to hydrate and repair the hair. When you wash it too often and don’t use additional care, it is possible that your hair might get damaged. Let it soak in for at least 5 minutes up to 2 or 3 hours. After that wash it off. 

Also remember, if you dry your hair with a towel, don’t rub heavily, but rather try to be gentle. This is much less damaging. 

So, this is my hair routine. I hope you liked it and and are able to implement some of those things into your own routine. Definitely check out my YouTube channel and my other blog posts and videos on fitness, styling and modeling.

See you soon, take care guys!

Triumph Trident 660 Review – Best Motorbike for every day and beginners? – ALL FACTS

Hey guys and welcome back to a new blogpost. This is something special for me I have never done before in my life so lets see how it goes. I am driving motorbike since im 16 years old and definitely love to be on the road with a bike. Special thanks to Triumph Germany for partnering up as an Ambassador for this special traditional company.

In this blogpost I am going to give you a review of the new Triumph Trident 660. It’s the new middle class bike for beginners and for every day use for advanced motorbike riders.

Triple powered performance, class leading technology and specification, all at an incredibly competitive price.

Appearance:

  • 4 different Colours (Matt Jet Black Silver Ice / Silver Ice Diablo Red / Saphire Black / Crystal White)
  • Matt black with a few details red and silver
  • Cool number plate holder
  • Stubby short tail section
  • LED Lights

The 660 triple engine delivers the perfect balance of low down torque and exhilarating top end power for optimum thrilling and responsive performance.

Facts:

  • 660ccm
  • 64nm peak torque
  • 81 PS Peak Power
  • 16.000km service intervall
  • 6 gears
  • Seat Hight 80.5 cm (tall or shorter riders? Yes its neither as low as a bobber and tall as a tiger) – but you cant lower it!
  • Tank Capicity 14L
  • 189 kg

Is it a good everyday Bike? – Distance Bike?

It is not really good touring bike because it has no windscreen, bags etc., BUT definitely a every day bike for some tours and also for the city. It is very good to handle and that makes it the perfect bike for people and for young beginner driver. Also perfect as second bike for every day instead of using your expensive one. The third group the Trident is perfect for are older riders that want to downgrade.

You have a nice upright riding position, its very light and easy movable and has power as well. The throttle is very easy for beginners (not as aggressive). The bike comes with two modes: Street mode and Rain mode (Less aggressive throttle responds)

Display:

  • Shows everything you need
  • Speed 
  • Time
  • Gear position
  • Rotation speed
  • Lights 
  • ec.
  • Additional Navigation pairing with phone

Accessories:

  • Quick Shifter
  • Heated Grips
  • Bluetooth Modul – Navigation 
  • USB Charger under Saddle
  • No exhaust accessory

Personal Final feedback

The Trident 660 by Triumph is the perfect mix between a beginner bike and also perfect handling for an every day bike. It combines traditional with modern style and you will be unique, instead of all the Yamaha MT 07, Honda CBR and Kawasaki out there.

Its the perfect allrounder and I can really recommend to go and check it out!

https://www.triumphmotorcycles.co.uk/motorcycles/roadsters/trident

Thats about what I have to say about the motorbike. You will find the full review on my Youtube Channel so definitely go and check out how the bike looks on the road.

FABS

https://youtu.be/jzTKAPQtfwY

Eyebrow Tutorial for men at home

Hey guys, I’m back with another tutorial! Now that your hair looks great, we want to make sure your eyebrows do as well. For that I got a little help from my friend Chris again (He is still a great barber😉). He plucks my eyebrows with a thread and tweezers.

From him I learned the right way to pluck them. You have to be careful, so it doesn’t look too feminine. If you like that look, pluck away! But for me it wouldn’t fit.

Step 1: Careful cleaning on top

I have very thick eyebrows, so we started by carefully cleaning out the single hairs on top with a thread. It is much cleaner with a thread than with tweezers.

Step 2: The middle part

Also we did clean the middle part, I am not a fan of a monobrow. 😀

Step 3: Shaping it

To get your eyebrows into a good shape, you need to find their highest point on top first. For that you take a pen or a stick, put it on the tip of your nose and lay it in a straight line over your pupil to the approximate high point of your eyebrows, to really get the detailed point. On that part you DON’T want to take away any hair, because that ruins the face and the eyebrows. Chris did a great job on that. Also remember to do it on each side seperately. 😀

Step 4: Form the eyebrow bottom

The top was done, so we continued with the bottom. Now the tweezers came into play. Again we did it very carefully. You remember the highest point of the eyebrows and how you should’nt take anything away of it on top? Well, on the bottom of that high point you can take away a little bit more, so you get the perfect shape.

And with that you’re done! I have learned a lot on eyebrow shaping, have you? 😊 For more tutorials like that, challenging workouts and exciting vlogs check out my YouTube Channel @fabianxarnold.

How to trim a beard?! – Tutorial 3 Day Beard MEN

Hey guys, welcome back! Today I want to talk about a very important asset to a man’s face: the beard.

When I was younger, I dreamed of having a real „man-beard“. Well, I am slowly getting there. Now I want to show you how I shave it, so it looks like a proper beard.

Before shaving

It is very important to let your facial hair grow for some time, even i fit looks horrible. To get the best out of it, you have to have something to work with. I try to work with one centimeter, that takes me about two weeks to grow.

Rough shave

I use a beard trimmer with millimeter adjustments, so I can be very precise. I always start with 5 millimeters and do a rough shave against the beard line. I start at the middle and do the sides after that (I go up until the middle of my ear, but you can change that up). Try to stretch your face a little bitt o reach every part of your face, otherwise some tiny hairs may be overlooked.
The moustache comes last. Here I adjust the trimmer to 4 or 3,5 millimeters.

If you have parts of your beard that are darker than the others, trim it a bit shorter, so it looks like it is the same length.

Details

After doing a rough shave, you have two options for the details:
1. Use a dry, electrical one blade
2. Use a wet shaver
I normally start with the dry blade and do the lines of my beard, later I clean everything up with the wet shaver.

To do the bottom lines on your throat properly, put one finger right where the chin ends and the throat begins. This is where you want to have your line. From there you go tot he sides and up to get a clean cut just along the transition of your chin to throat.

Some people (like me) don’t have that much facial hair on the sides. So I try to shave everything above the visible hair and create an intentional line that way. I basically draw a beard into my face. 😀

After that clean everything out with shaving cream and the wet shaver. Remember: Always cut up to down, otherwise you might destry your skin.

Aftercare

When you are done, wash the remaining cream off with water and dry your face with a towel. Don’t rub it in, but rather dab and press it against your skin. That way it is much more skin friendly.

Having done that, it is time to use after shave cream. I don’t really use proper after shave with alcohol in it, but natural products with aloe vera inside. Again, don’t rub it in, but rather to little dabs.

And after that, you are done! I hope I could help you with your beard routine and some of you will walk around with a massive beard shortly. 😀

If you want more tutorials like that, don’t forget to subscribe to my YouTube-Channel @fabianxarnold.

I am looking forward to see you! Take care!

Fabian

Perfect Morning Routine Men | how to increase your morning?

Hey guys, welcome back!

Everybody starts their days the same way: By getting up in the morning. 😀 Some may need longer to wake up, others are already fresh and ready as soon as they open their eyes. Today I wanted to show you my morning routine, which takes about one and a half hours. Of course some of you may not have that much time in the morning, so just try modify it to fit your way – and maybe you can take one or two things from mine to start your day better.

Waking up

My alarm rings at 6:30 every morning during the week. Even though I am selfemployed and theoretically able to sleep in, I like to get up early. It’s the best way for me to be productive.

Getting up

I think the next step is the same for everyone: Going tot he bathroom. 😀 Then I wash my face with cold water. You may not like the cold, but you will feel fresh and awake afterwards.

After that I always drink a few glasses of water, to get hydrated. The average person loses about one or two litres of fluid during the night while sweating. By drinking water, I get that back.

A new thing each day

I open the windows, let some fresh air in … and go back to bed. But not to sleep. Recently I started learning spanish. The reason for that is simple – like Arnold Schwarzenegger said: „If you learn one new thing a day, you will feel more productive“. So I do that for about half an hour until 45 minutes.

When I am done learning, I get up for real! 😛 I make the bed and put on some music. Making the bed is a ritual that helps you getting more into a routine. It is a promise to yourself to not get back in there. Regarding the music, in the morning I like to listen to some deep house tracks. It has just the right vibe.

Breakfast

Right now I am doing intermediate fasting, which means I don’t eat until 11 am. So this early I only make some tea, which, first of all, is delicious, and second, it keeps your stomach full, so you don’t get hungry.

In addition to that I take some supplements, which I will list right here:

In the morning:
– L-Carnitin: It helps to burn fat + you have more power at sports
– Zink + Magnesium for better skin
– Daily Vitamins for General Health

Before Training:
– BCAA for better muscle recovery

In the evening:
– Omega 3 for better Skin (Naturals Fats)
– CBD in the evening

Body care

So, when I took care of the inside of my body, it is time to take care of the outside.

Fort he face and face I use skin cleanser. It doesn’t really matter which product you use, because every skintype reacts differently to different products.

Then I am doing my hait (check out my hair tutorials for that 😉). I don’t wash it every day, because it would get too dry and fragile. I always wash it after workouts, but only three times a week I will use shampoo. That way my hair stays healthy.

I work my down, so to speak, brush my teeth and moisturize my face. Again: find the product that fits you best. Also it is important to NOT rub it it, but rather touch it gently. That is way better for your skin.

To close it out, I use a bit of perfume. Maybe in the future there will be a post about my favorite fragrances? 😛

Getting the system going

By now you should be pretty awake and feeling good already. But to get my systems going, I like to do a few pushups. I do round about 35, but you can work your way up from five to ten to fifteen and so on. It’s not a workout, just something that gets you pumped.

The best way to continue your morning would be a morning walk after that. I don’t always have time fort hat, but when my schedule allows it, I like to combine business calls with a long walk. This way you can burn additional calories (like 300). When you do it before breakfast, you burn even more!

The white board

The last step in my morning routine is checking my white board. On that I write my to do lists. It has helped me getting so much more productive, because you always see what’s next! And I am not going to lie: It feels great, erasing a finished task from that board. Having done that, I can start my working day right.


So, that was my morning routine. Do you have any suggestions on how I could make it even better? Do you have any secret tips I don’t know about yet? Let me know in the comments!

Down here you will find the Youtube Video where I actually take you on my morning routine! Have fun watching it!

Hairstyle Tutorial: Leonardo DiCaprio

Hey guys, I hope you are all doing great!

I cut my hair. Yes, I did it. For 12 months I grew it and I wanted to cut it for so long – and I finally did (well, not me personally, but you get it :D).
New hair, new style! There are many different ways I can style my hair now. This time I want to show you a style that I think is very cool. I call it „The DiCaprio“. As you can tell by the name already, the look will be quite similar to Leonardo DiCaprio’s hairstyle – but in the 90’s. At that time he wasn’t the absolute megastar he is today, but rather a very talented up and comer, who started to land his first major roles. Oh, and a ladiesman as well.


Step 1: Wet your hair

You don’t need any products in your hair to begin with. You don’t even have to wash them beforehand. Just make sure, it is evenly wet and not dripping.


Step 2: Put volume in it

It doesn’t matter which product of volume mousse you use, it is just important that your hair has a little bit more strength in it and it doesn’t fall down so easily. Make sure that you don’t overdo it on the back and the sides though, because we don’t want to have too much volume on those parts, only at the top.


Step 3: Dry and form

Use a hair dryer and a brush. The main goal here is that your hair doesn’t fall down in your face anymore. You should also start on your middle parting by brushing your hair to either sides. After that you already should have a nice Leo-effect.


Step 4: Lean over and mess it up

Now your hair should be almost dry. In the final steps I like to bend over, so the hair falls straight down, and mess up the front strands to give them even more volume.
Now when you go through it with your hands (front to back), the Leo-effect is even more obvious.


Step 5: Matt paste

It is important that you use dry matt paste, not wet one! Even if you want to have a wet look, there are other ways to do it, just wait and see. 😉
With the same movement as before (front to back) you can give your hair now a nice form. To get the right texture, be sure to really mess it up at the end and brush it in. Now you can form it into place.


Step 6: Beard oil

To give your hair a more oily and healthy look, brush in some beard oil. You can even give yourself a little massage. Don’t use too much, otherwise it will look cheap. That is the advantage beard oil has to wet gel. It is much easier to get a cool look with beard oil, and in addition to that you can make fine adjustments without having to worry about soaking your hair.
After that the Leo-effect should be in full display. Damn, what a hairstyle!


Step 7: Hairspray

If you want it to hold, use some hairspray. Again: less is more. Make sure it holds, but don’t empty the bottle. 😀


That’s it for this awesome hairstyle! Tell me which styles you want to see next and I will try and make them happen. In the meantime, check out my Youtube Channel @fabianxarnold for more content! I recently uploaded a video, in which I tell you the story of how I became a model – of course you will find that on my website, as well.

So long, you guys, enjoy your day! Until next time. 😊

https://youtu.be/ZBTRUtOydmw

Fashion: Hairstyle Tutorial Long Hair

The Hairstyle is a very important part of fashion.

There are countless tutorials for women with long hair made by models. Men have to take a bit of a back seat there at the moment.

That’s why today I want to show you my daily hair styling routine. I hope you can apply some of it on your own style!

Before we begin

The styling already starts in the shower. I mostly use shampoo and conditioner from Fable and Mane, which is a vegan and silicone-free product that I highly recommend.

Every two to three days I also use the hair oil of the same brand. It makes the hair stronger and healthier. But the oil is not a necessity, just a nice bonus that smells very good.

Drying

After showering, I dry my hair roughly with a towel. After that, the hair dryer and (if necessary) a brush comes into play. Nothing too spectacular here.

But after blow drying you will notice the use of the conditioner, because your hair should now already be a bit more voluminous than before. It is important that you do not blow dry your hair completely, but keep a slight moisture in it. (If you are unsure about that part, just look at the video on my Youtube channel, there you can estimate quite well on the basis of my hair, how it should look).

Depending on the look you want, you can then comb through your hair again, I always like to do it to even it up a bit.

Styling

Now it’s time to style. I use a little bit of beard oil first. Beard oil? That’s right! Rub it in evenly and touch up with a comb if you want. This gives the hair a shiny look. But be careful: Only use a fingertip, otherwise you can may look like the godfather in the end.

After that you can be creative and come up with your own style. I like to use matte paste because I like the voluminous look and the interaction of the matte and the shiny oil. But you can also use gel or another styling product. Go wild!

Then, as the icing on the cake, I like to give my hair a drizzle of hairspray. But again, not too much! Otherwise your hair may stick together, get greasy and all the work you just put into your hair will be gone.


And that’s about it, I hope I was able to help you with this tutorial!

For the whole tutorial as a video, check out my YouTube channel. There you can take a closer look at the subtleties of the styling.


If you have questions or suggestions for new tutorials or video ideas, use the comments below!

Mercedes Benz Fashion Week Berlin 2019 – Highlights, Impressions, Modeling

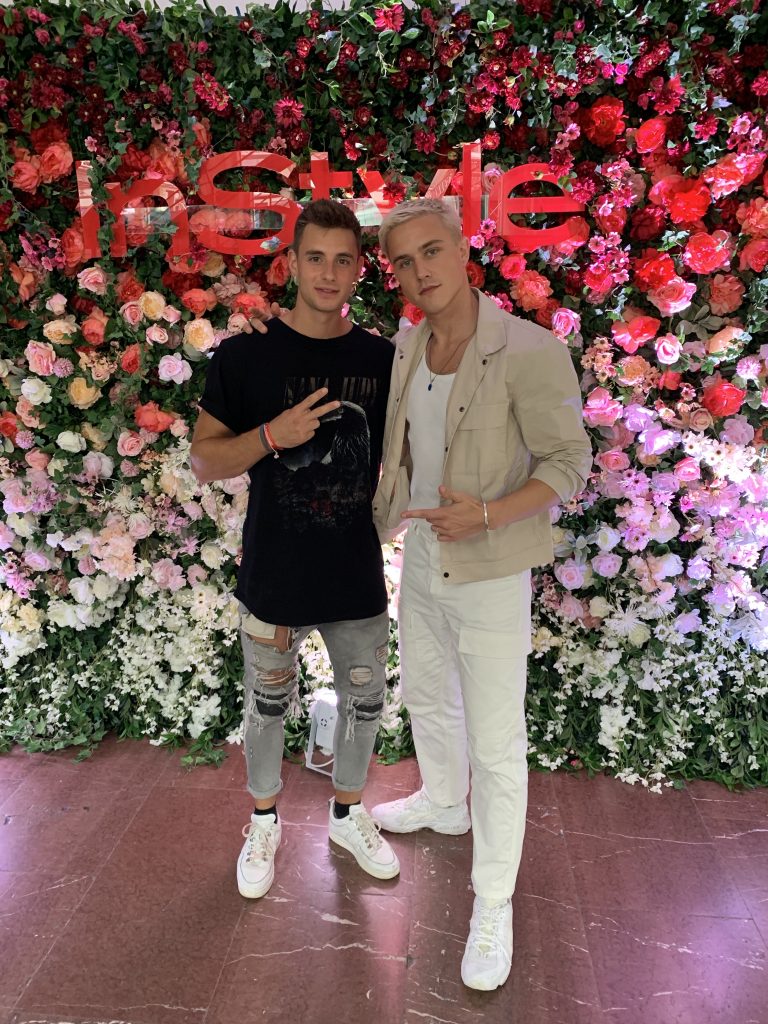
I know Fashion Week Berlin 2019 was more than a couple month ago. It was in July 2019. Nevertheless, I would like to share my impressions with you. It was a crazy week and I met a lot of people. Who I met and on which parties I was, you will get to know in this blog post.

Impressions of the city of Berlin

As most of you know, Berlin is the capital and is the largest city in Germany with 5 million inhabitants.

I think Berlin is a very interesting city, because you are not limited in your options. You can achieve everything. There are many freethinkers and alternative ways of thinking are always tolerated.

There are very cool clubs to party, places to chill with friends and just hang out. Berlin compared to other German cities is a snappy city.

Why should I go to Fashion Week?

Anyone who is from the fashion industry, working for a brand, as a photographer, as a model or as a stylist. It makes sense to go to the fashion week because there can be great new people to connect with. As a social media creator you can connect with brands and work out deals. You can also get to know new social media creator. For Brands it makes sense to represent your own brand in order to increase it. So basically Fashion Week is great for networking. A little tip: always take a business card with you.

As a model at Fashion Week in Berlin

This year I was booked as a model for the finale of Berlin Fashion Week in the “Haubentaucher”. It was a lot of fun to run in this great location as a model on the catwalk. I was just back from Los Angeles for a week and really enjoyed it.

Fashion Week is great to enlarge the image as a model. Money-technically, Fashion Week is not really worth it as a model.

How do I get invited to a fashion week?

If you have a certain size or reputation in the fashion scene, you will usually be contacted via email from PR agencies. Maybe your management will also take care of inviting you to red carpet events and shows.

If you are at the beginning of your career, it makes sense to email PR agencies and ask for invitations for the Fashion Week. You can also contact large brands, which have their own shows.

There is also the possibility to get appointments for new shows through contacts you made just now on some shows. Not all shows are at one location. Sometimes  you get confused where the next show is. And only by asking, you can get a rough overview of the whole event schedule.

Impressions of Fashion Week in Berlin 2019

The Fashion Week in Berlin is always a lot of fun, because I meet a lot of people that I have not seen for a long time. So it’s like a class reunion.

Especially among social media craters and models, there are connections and it’s just a lot of fun to go out and celebrate. For me Fashion Week in Berlin is less to increase my reputation. It’s more to meet all people again. For example, I met Carlos or Luca again.

I’ve been to a lot of events this year, including the Hugo Boss party, the About You show, the Michalski show, Otto, Guido Maria Kretzschmar, the Bunte Magazin party, the Tigha party and many more.

It’s actually like every year so I do not want to talk a lot about the individual events.

Conclusion

That was just a small review of the Fashion Week in Berlin 2019 and some general information. For the next Fashion Weeks, I will write detailed blog posts and also go into the individual events. For modeling-questions and questions about my person you can go and check out my Youtube Account with Q&As and also My Instagram account 🙂

If you have any questions, let me know in the comments.